The scratch test is a widely used method of simulating in a laboratory the stresses that a coating undergoes in everyday use. A diamond indenter with a rounded tip (Rockwell) is pulled across the sample at a constant speed. The resulting scratch on the surface provides information about how the coating will behave in real life.
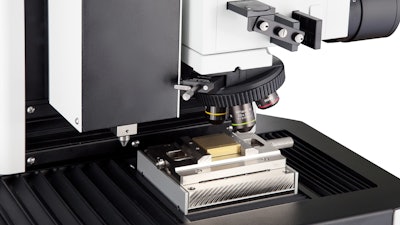
The FISCHERSCOPE ST 200 is the first scratch tester from Fischer (Windsor, CT). The instrument offers several different measurement modes. This allows the test force that the indenter exerts on the surface to remain constant or increased. A scratch test applied with constant force is typically used to determine the scratch hardness or scratch resistance. More often, the progressive mode is employed. In this case, the force acting on the surface is increased either incrementally or linearly. Starting out with an initially very low load, the indenter is moved across the coating. As the force increases, it gradually penetrates into the layer. As the penetration depth increases, so does the material stress, until a certain force – the critical load LC – is reached, which is the force that causes material failure: Cracks form and the coating chips off. For the test to be meaningful, the load must be chosen correctly: If too low, the coating is hardly stressed at all; but at very high loads, the indenter can penetrate through to the substrate and be damaged. With hard material layers such as titanium nitride or diamond like carbon (DLC), test loads higher than 30 – 50 N are often necessary to trigger large-scale chips. Softer materials like paints, on the other hand, require low test forces, since the coating usually fails much sooner. To cope with such diverse coatings, the ST 200 offers a wide range of possible test loads: from 0.1 to 200 N. That makes it ideally suited for measurements on hard coatings, while still allowing for the testing of thicker paint layers.
Evaluation: A Trained Eye Needed
The scratch test is a comparative procedure that relies on reference measurements. Initial evaluations are always performed visually. Under a high-resolution microscope, the examiner determines at which force the first cracks formed, or when the coating chipped off. In addition to the microscopic evaluation, the ST 200 can also record acoustic emissions, i.e. the scratching noise, as well as the tangential force, i.e. the resistance that the material exerts against the indenter. Did the scratching get louder? Or did the diamond tip suddenly start dragging through the coating? Both are signs of material failure. The intuitive user interface of the WinSCU software summarizes all three parameters in a single evaluation step: the microscopic image, the acoustic signal and the change in tangential force. The critical loads are thus defined in just a few mouse clicks.
More Scratch Testers Planned
The ST 200 rounds out our portfolio for the tools industry. Together with our nanoindentation systems and the X-ray fluorescence instrument XDAL, Fischer offers a total quality assurance solution for TiN and DLC coatings. For measurements on soft materials like polymers and plastics, another scratch tester is already in development.
Visit Fischer in Booth #B10026 at FABTECH, or contact the company at www.fischer-technology.com info@fischer-technology.com.


